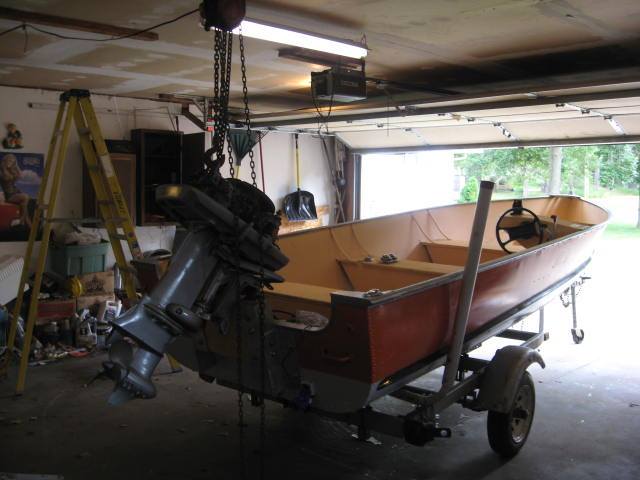
STEP 1 - FIND A PIECE OF JUNK OLD, SUPER LIGHT-WEIGHT 16' LUND S-16 BIG LAKES BOAT. Alex said it must have a steering wheel. No tiller. We found our pile of junk at Dave Tucker's Power House Marine in La Crosse, WI. The boat hull was in great shape, the paint and interior was very weather-damaged, it only weighed 263 lbs, yet could handle a 40 hp, which it did have the original motor. We made sure the lower unit was in great working condition before we agreed on a price, and Dave assured us the lower unit was "gone through thoroughly and was clean and fully operational."
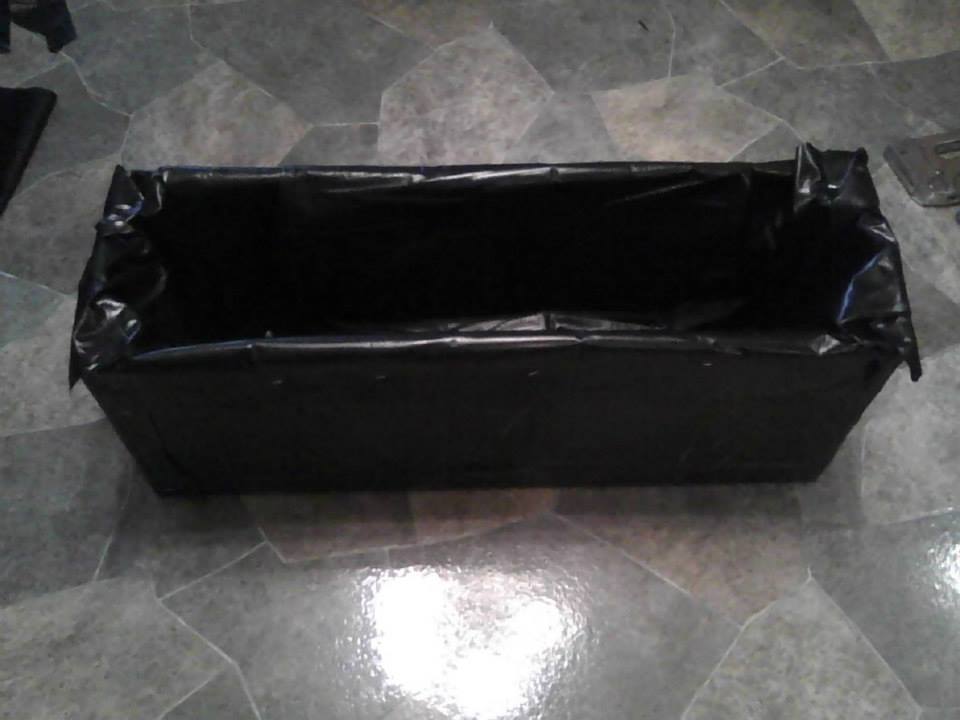
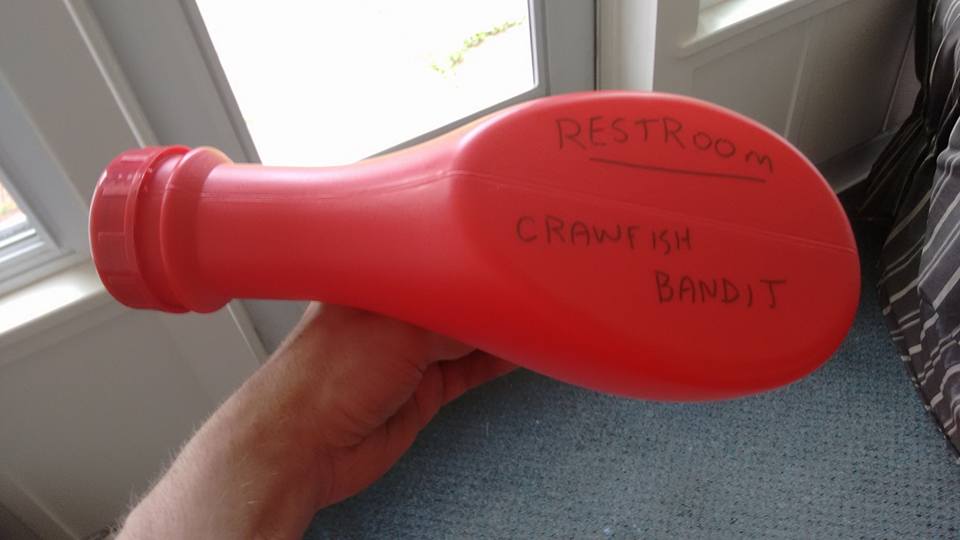
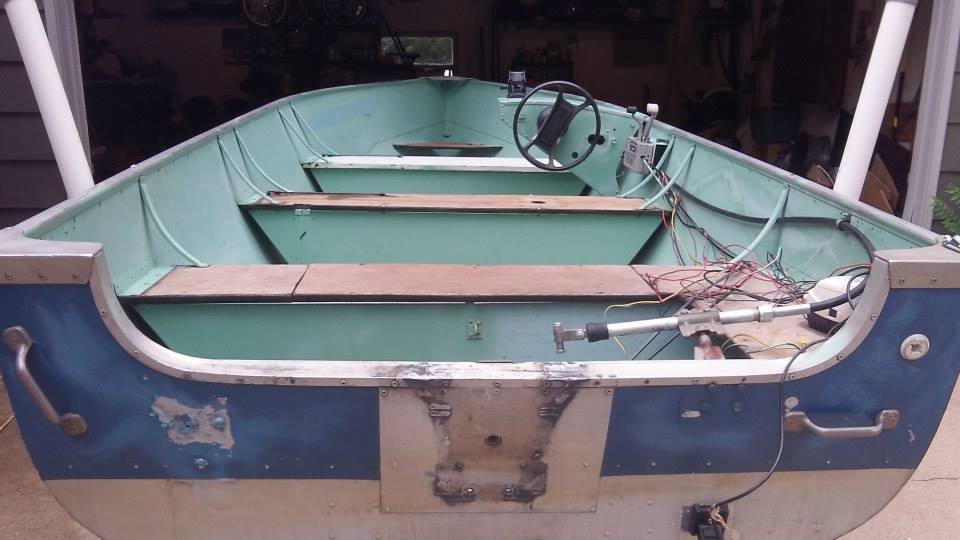
STEP 2 - BUILD A LIVEWELL. The original owner modified the back bench into a storage area with piano hinge and cut plywood. We utilized this area for a functioning livewell. Conveniently located near the batteries, we could run a clamp-style aerator a short distance to the livewell. We used plywood and wrapped it in waterproof pond liner, and chose black because it seems to make the smallmouth bass bring their "tiger stripes" out when they are trying to camoflauge themselves while waiting for weigh-in. Before you fill it for your first legal keeper, you can use it for a storage unit for cull tags, bump boards, lip grips, scales, and a restroom, which can be purchased very cheaply.

STEP 3 - REPLACE ALL TRAILER BEARINGS AND INSPECT HUBS/AXLES. The first step is to get your boat to Papa Bob's, since we didn't have a clue what we were doing. We had braided line wrapped around the inner seal and lots of water in the bearings. Papa Bob packed brand new bearings and greased it up good and made it a year and a half, until we found someone else's braided line blew the seals on the other side. Best bet is to check these every fall before winter storage. Bearings and grease are cheap, check them often and carry spares to prevent a disaster on the highway.
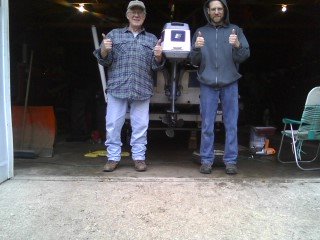
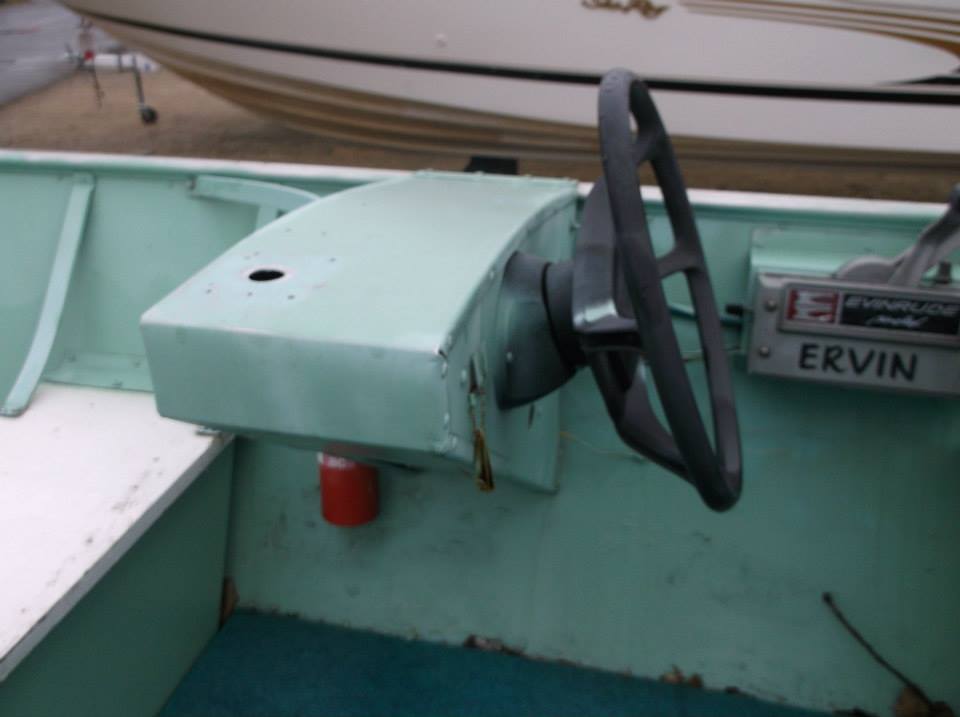
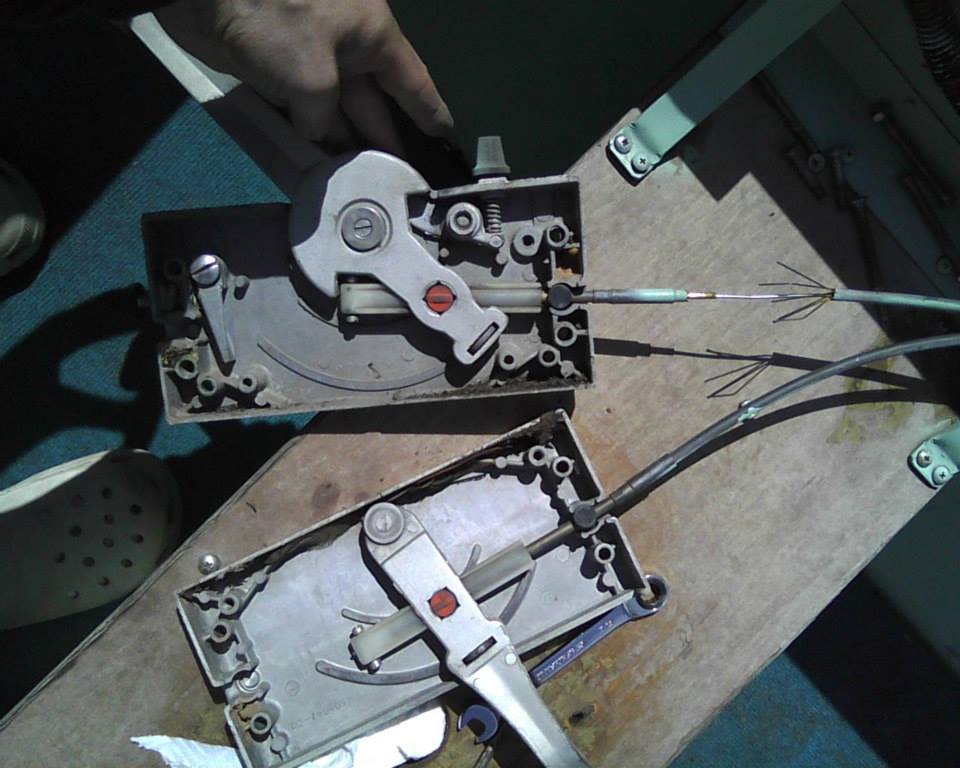
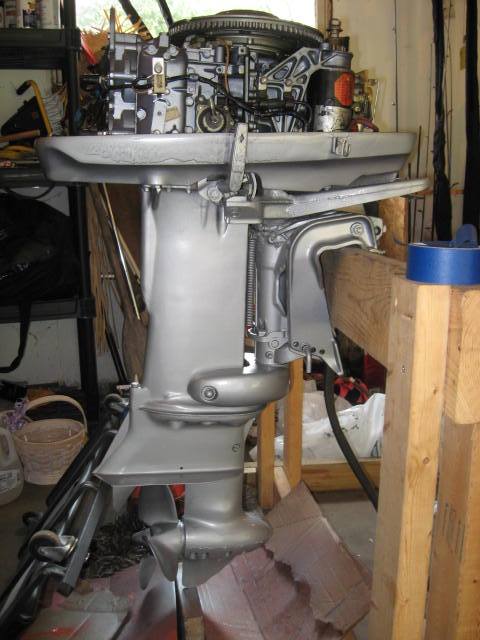
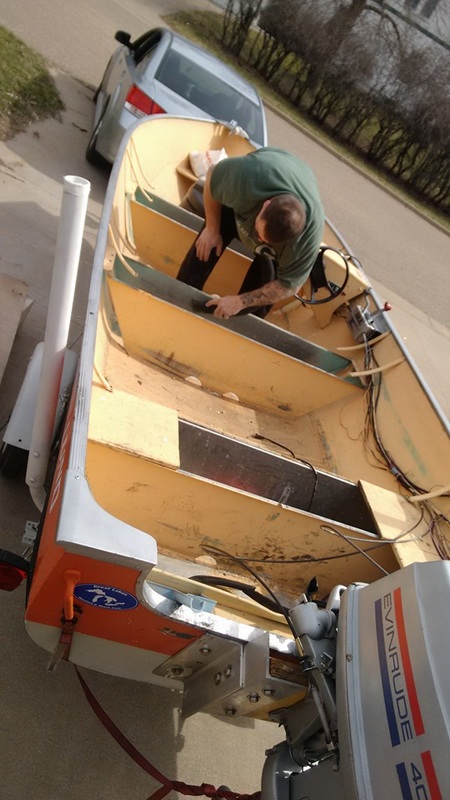
STEP 4 - BREAK YOUR STEERING AND YOUR SHIFTER/THROTTLE CABLES ON THE FIRST USE, AND FIND OUT THAT THE DEALER LIED ABOUT THE LOWER UNIT. Once your boat is legally registered, take it out on the water and find out that it doesn't steer, the throttle cable doesn't work, the shifter doesn't shift, and the lower unit is junk. Call the local shop and get an estimate for $355 for the steering, $100 for the cables, and $800 for the lower unit. Contact Dave Tucker at PowerHouse Marine, tell him the boat never worked, have him tell you it was mint when you bought it, and argue with him via email. Then bring the boat into his shop and tell him to fix it. His worker will tell you there is nothing you can do besides hook a bungee cord to the shifter and attach that to the dash the entire time you drive because "OMC discontinued the lower unit parts a long time ago and a local shop would have to machine you new parts for $1,000." Insist the problem is that the lower unit gears are slipping from the dog clutch and they need to look at it. Have them tell you over and over that its not the problem.
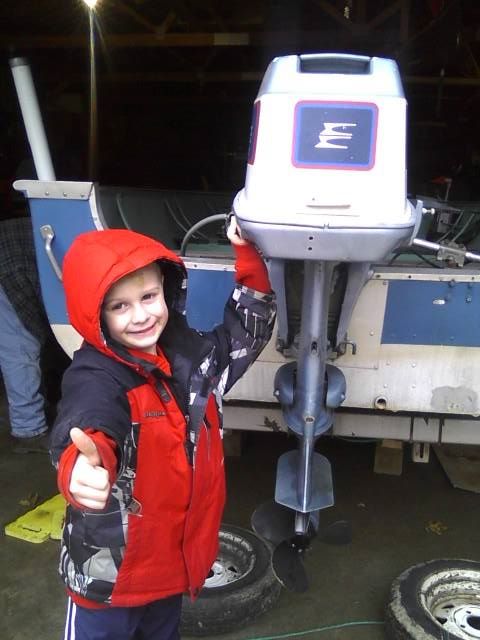
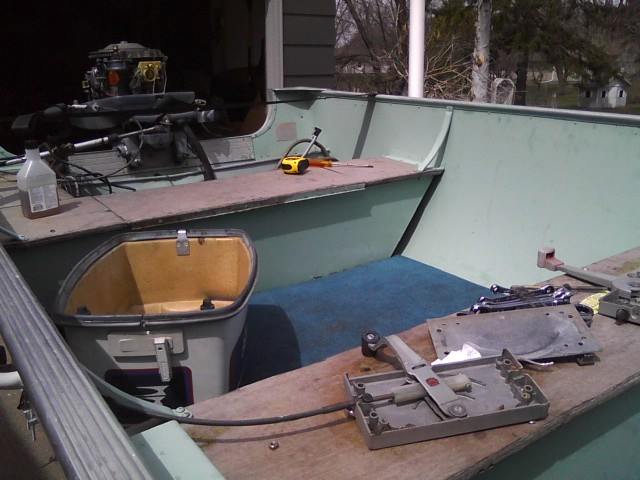
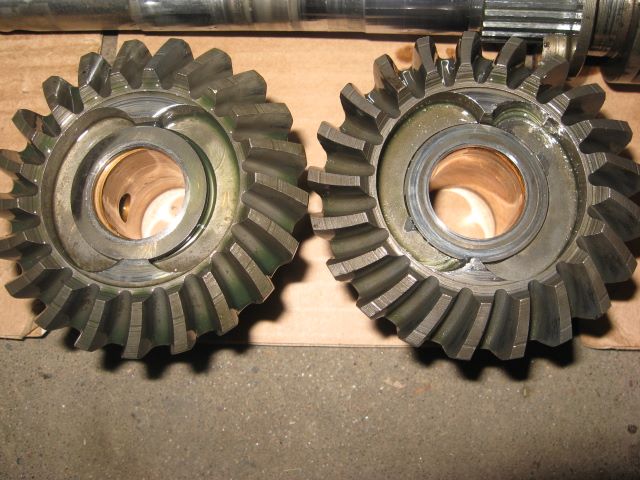
STEP 5 - Bring your piece of garbage boat to Boater's Choice Marine in Lake Hallie, WI. Have them repair the complicated steering system. Order the cables and figure out how to install them yourself. Go on eBay and order a 37 year old original Evinrude Service Manual. Try and learn how a lower unit system works and how to repair it yourself even though you have ZERO mechanical skills. Drop the lower unit, rip out the prop shaft, and remove the COMPLETELY WORN forward gear and dog clutch. Contact Dave Tucker at Power House Marine via email, tell him how much of a piece of scum he is and know that you have been had by a shady dealer. Buy some new gears and a clutch and some expensive adhesives and gasket makers, and replace the impeller and shift linkage bushing while you have the lower unit apart. Stock up on shear pins and cotter pins, and purchase a replacement prop for emergencies. Reassemble the lower unit, and feel good about yourself after saving over $600 in labor and for figuring out how to repair a boat motor on your own. Take it out for a test run and find out that your repair work fixed the motor 100%. Mix lots of SEAFOAM in the gas and clean the carb that hasn't been used in decades.
STEP 5 - Bring your piece of garbage boat to Boater's Choice Marine in Lake Hallie, WI. Have them repair the complicated steering system. Order the cables and figure out how to install them yourself. Go on eBay and order a 37 year old original Evinrude Service Manual. Try and learn how a lower unit system works and how to repair it yourself even though you have ZERO mechanical skills. Drop the lower unit, rip out the prop shaft, and remove the COMPLETELY WORN forward gear and dog clutch. Contact Dave Tucker at Power House Marine via email, tell him how much of a piece of scum he is and know that you have been had by a shady dealer. Buy some new gears and a clutch and some expensive adhesives and gasket makers, and replace the impeller and shift linkage bushing while you have the lower unit apart. Stock up on shear pins and cotter pins, and purchase a replacement prop for emergencies. Reassemble the lower unit, and feel good about yourself after saving over $600 in labor and for figuring out how to repair a boat motor on your own. Take it out for a test run and find out that your repair work fixed the motor 100%. Mix lots of SEAFOAM in the gas and clean the carb that hasn't been used in decades.

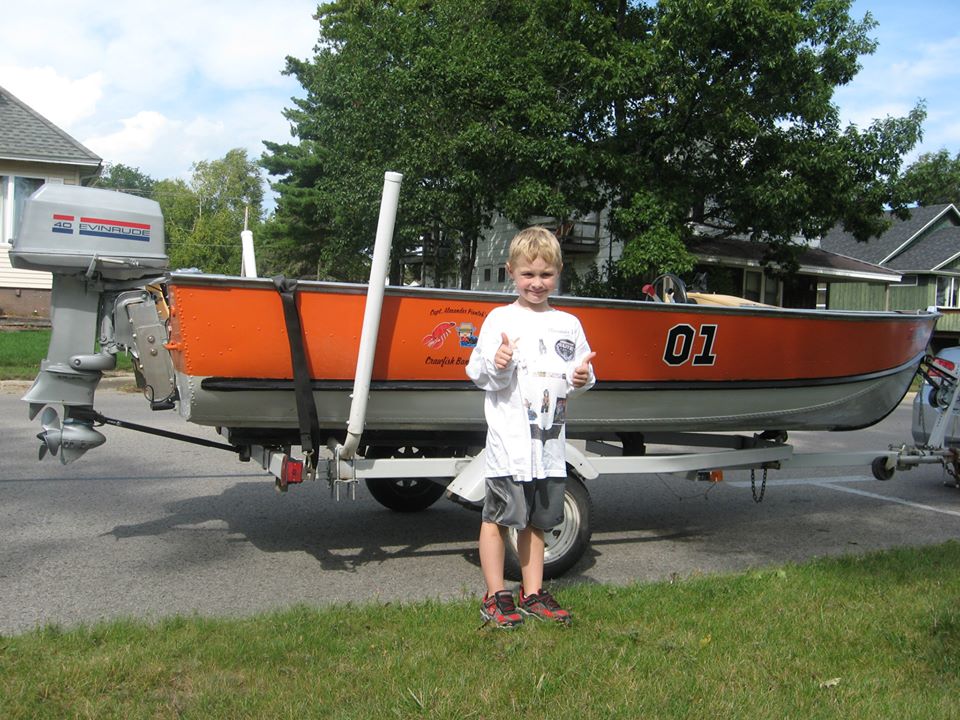
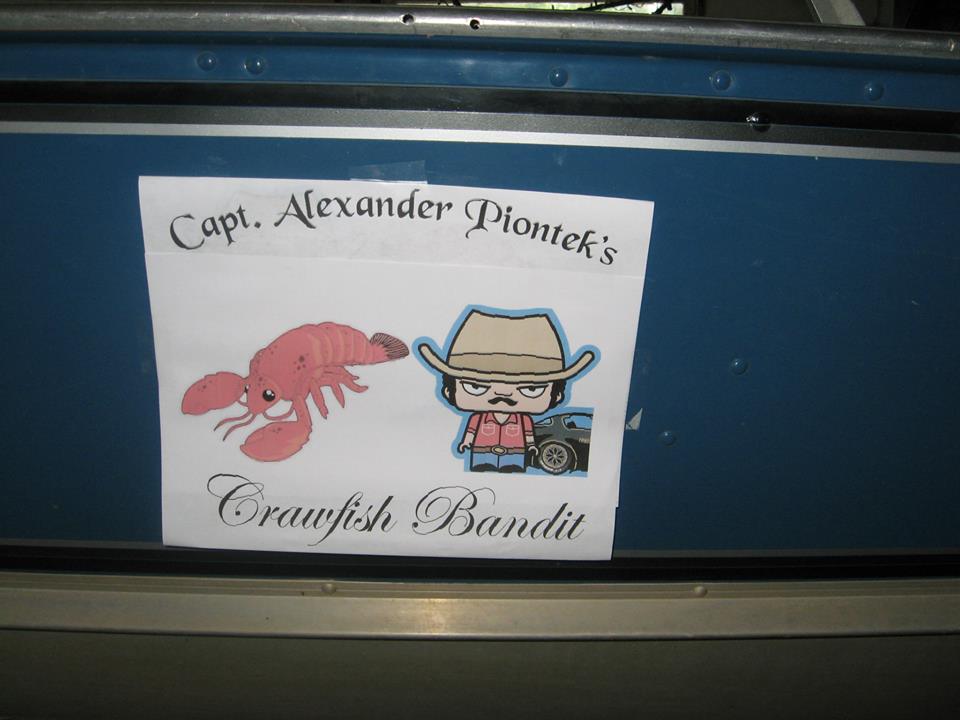
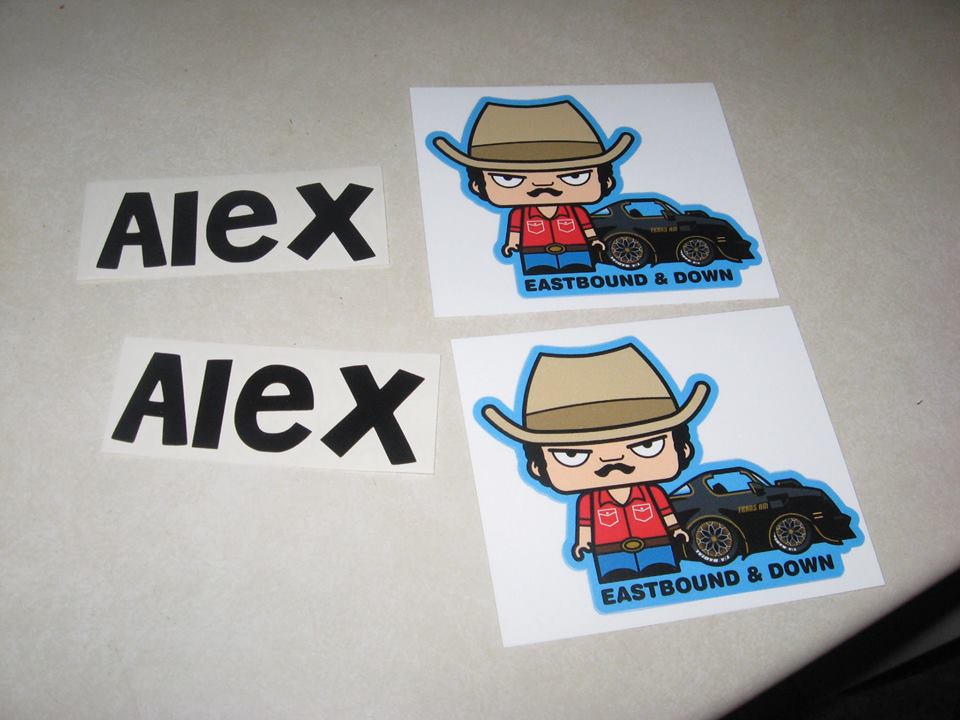
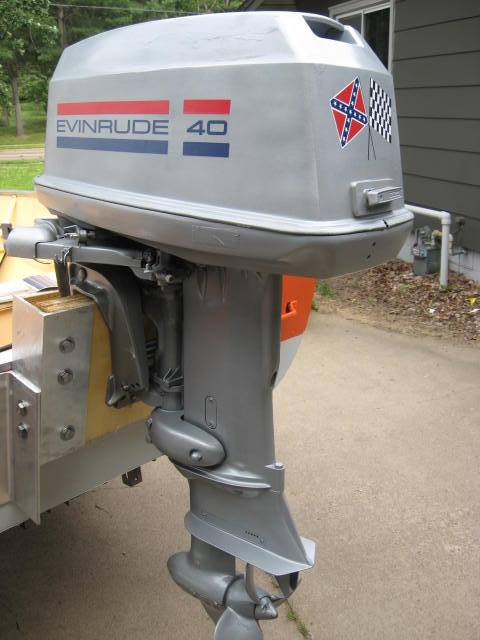
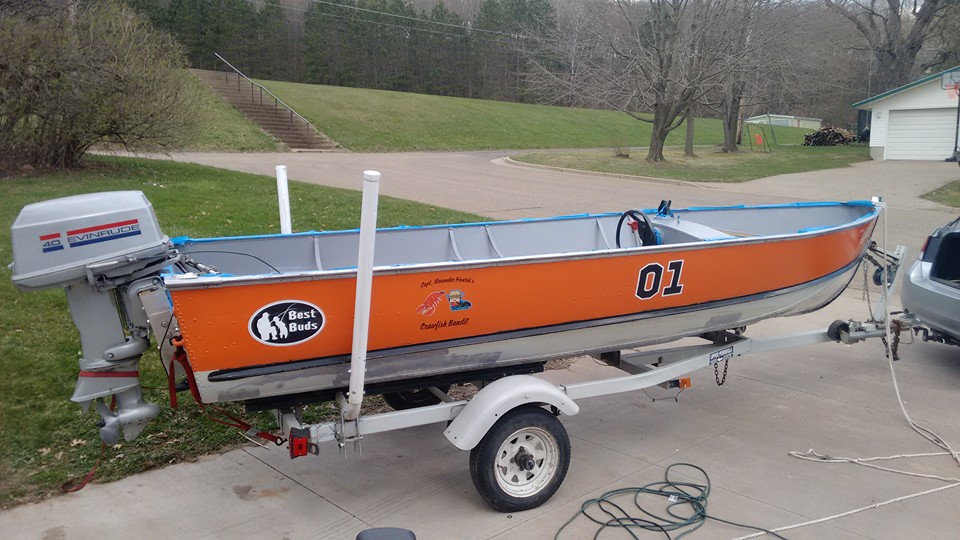
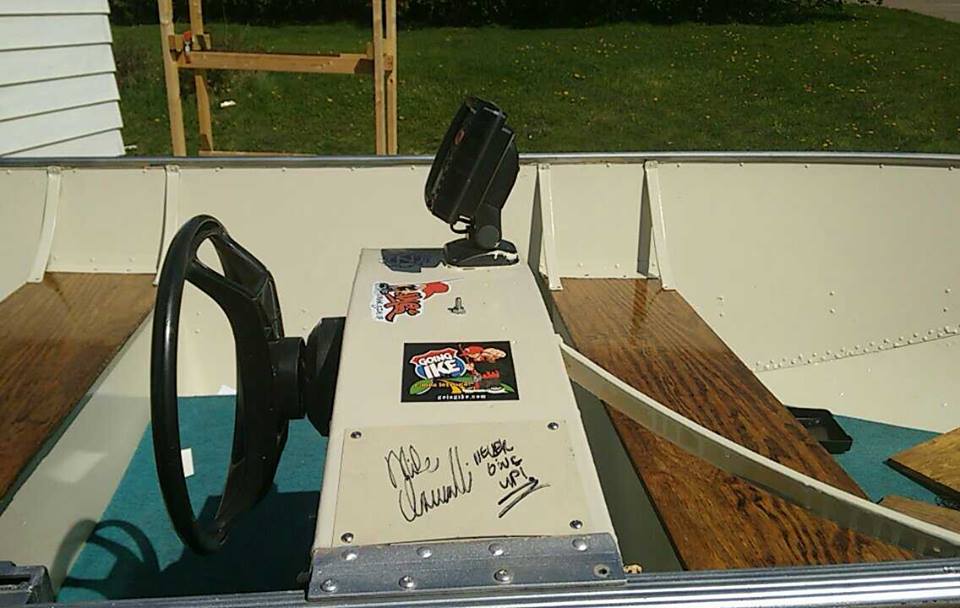
STEP 6 - SAVE MONEY, WHILE DESIGNING YOUR LOGOS AND PAINT PATTERNS. Go out and catch some fish in your beat-up, ugly, faded, rough idling boat. The fish really don't care what your boat looks like. Head up to Turtle Flambeau Flowage and hammer fat smallmouths on hand carved Spitter Pops that you made in your garage. Tell your kid to "GO IKE" and scream in the smallmouth's face about what kind of lure he just bit. When you saved enough money for funding the paint restoration, buy some Valspar Tractor Paint and custom order some high quality, fade-resistant decals. In this case, we needed a crawfish (lobster decal from Maine,) we needed Burt Reynolds, some golf cart General Lee decals, some cheap aftermarket eBay Evinrude 40 hp outboard decals, high quality plywood and aluminum to build a jackplate and lift the long shaft motor a few inches, and some sweet decals from Mike Iaconelli and Mark Zona.
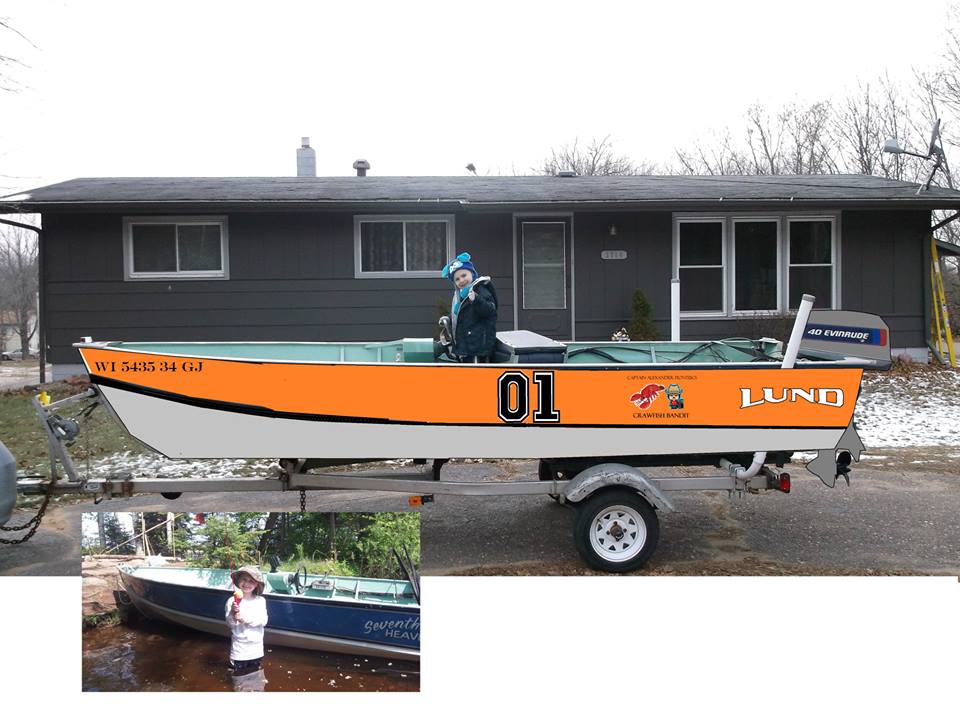
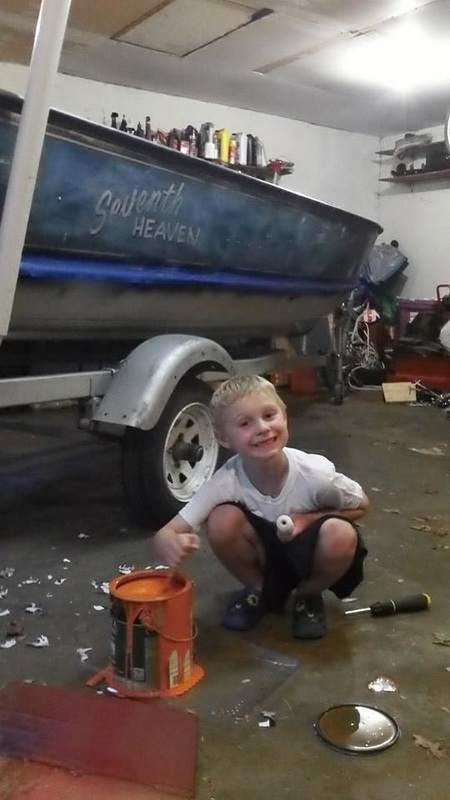
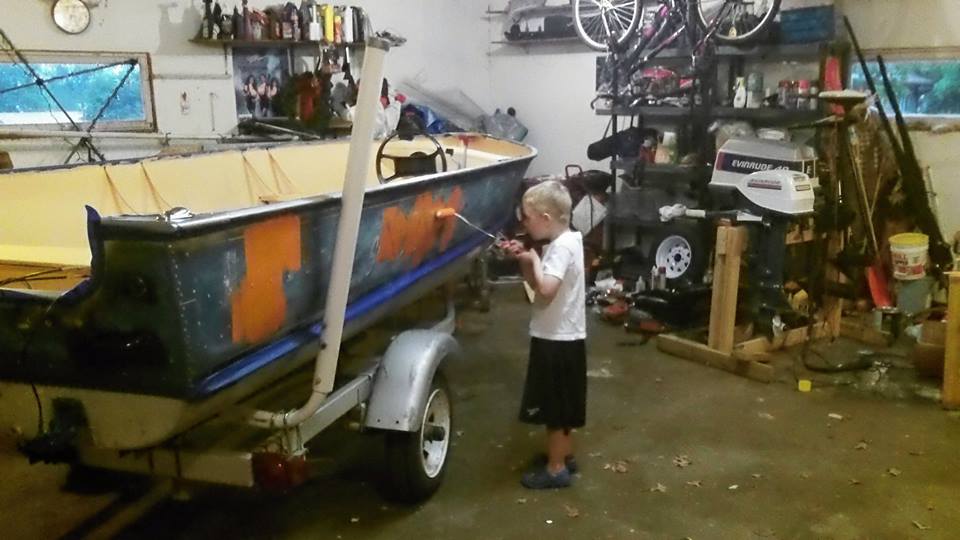
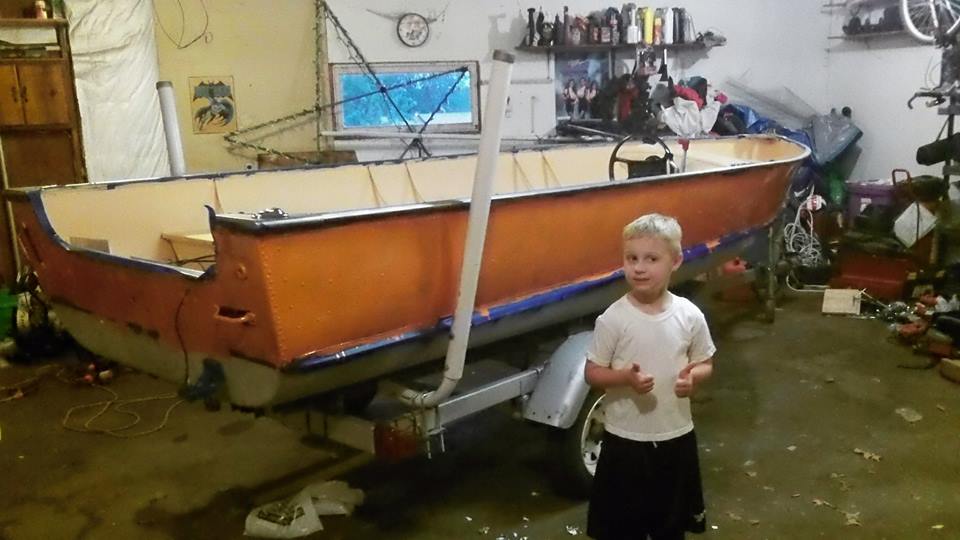
STEP 7 - GET PAINTING! MAKE YOUR BOY DO ALL THE WORK! First make sure he washes it throughly with soap and water with the motor removed. Rough the paint with some sanding. Prime it. Paint it. Let the oil-based paint dry for days. Then put your decals on.


STEP 8 - BUILD AND INSTALL A JACKPLATE. Use thick aluminum bracing from Steel Town in Elk Mound, WI. Use spar varnish on very high quality plywood. Use stainless steel bolts, washers, lock nuts, and bracing. Silicone the holes very very well to prevent leaks. The jack plate MUST be done correctly. Raise the motor 2.5" for higher speed and better cornering and hole shot. Attach the motor to the jack plate after the motor has been cleaned, de-greased, primed, painted, and after the BEAUTIFUL and very talented) Angela Piontek installs the decals in her own personal custom design.
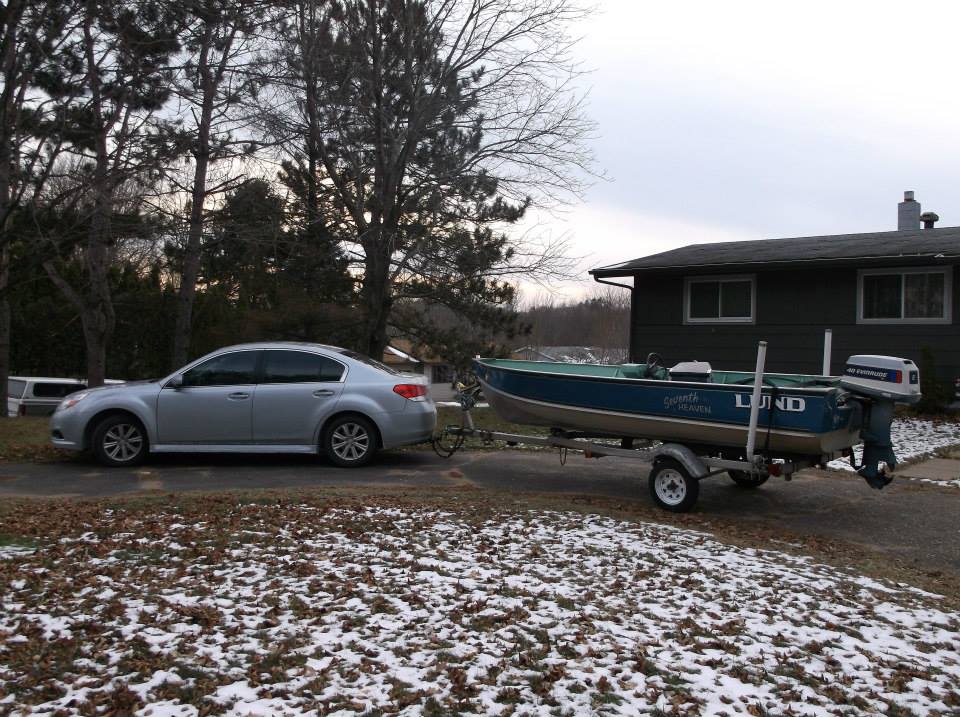
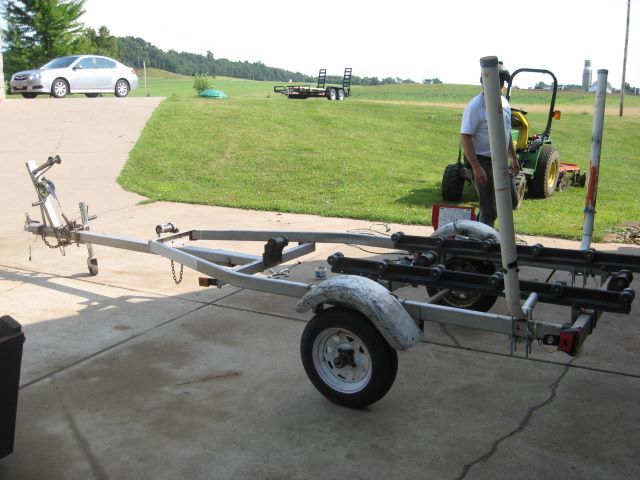
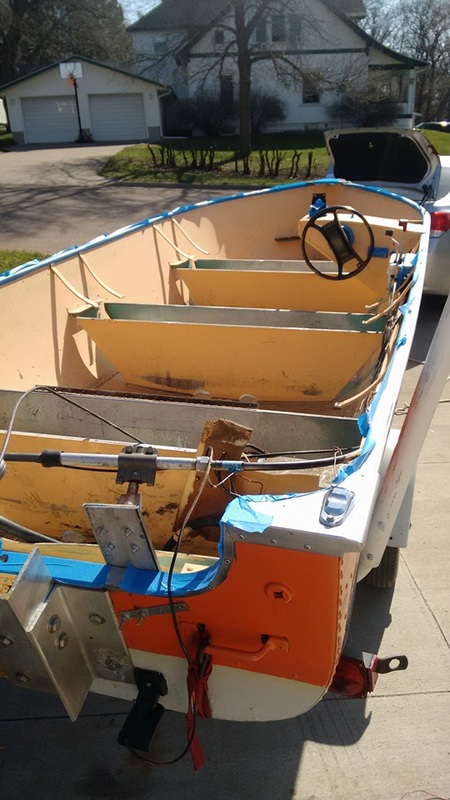
STEP 9 - TAKE THE BOAT OFF THE TRAILER, SET IT IN THE YARD, HAVE A VICIOUS DOG ATTEMPT TO EAT YOU, JUMP IN THE BOAT AND HIDE FROM IT WHILE CALLING THE COPS, THEN TAKE YOUR EMPTY BOAT TRAILER TO PAPA STEVE'S FOR WELDING REPAIRS. Have the tree stand welding expert fix your cracked fenders. Adjust your trailer roller railings to be perfectly square with the trailer frame again. Clean your tail light grounding area with a metal filing tool/rasp. Remove your trailer tires and keep them as spares. Put brand new rims/tires on. Prime and paint your trailer with Valspar Tractor paint. Inspect/replace any issues with the winch and chain system as well as address any wiring issues.

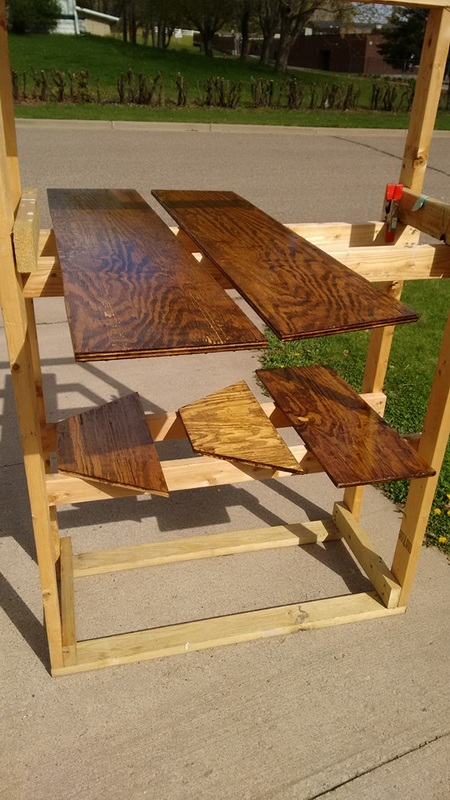
STEP 10 - HAVE GOOD BUDDY KEVIN COME OVER AND HELP YOU BUST ALL THE GARBAGE BOLTS THAT ARE HOLDING THE ROTTEN WOODEN BENCHES TO THE BOAT HULL. Throw out all the rotten wood, replace them with cheap, but thick plywood at Menards. Use sanding sealer, stain, and spar varnish. Do it right or it WILL rot!! Paint the interior of the boat, install your new beautiful glossy benches.

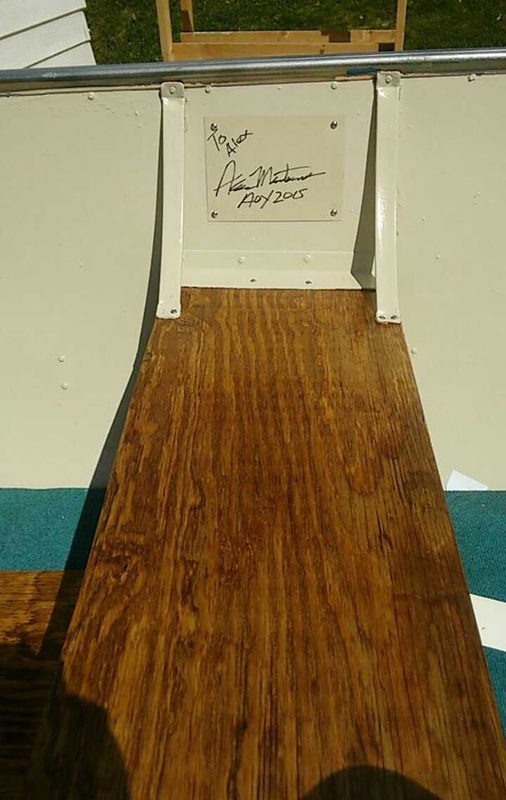
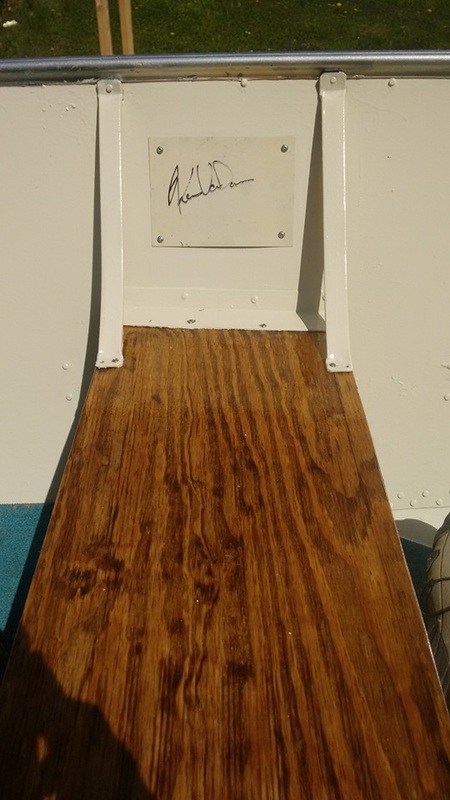
STEP 11 - INSTALL YOUR INTERIOR DECALS FROM MIKE IACONELLI AND MARK ZONA. Have Iaconelli, Aaron Martens, and Kevin Van Dam sign panels and then install them inside the boat.
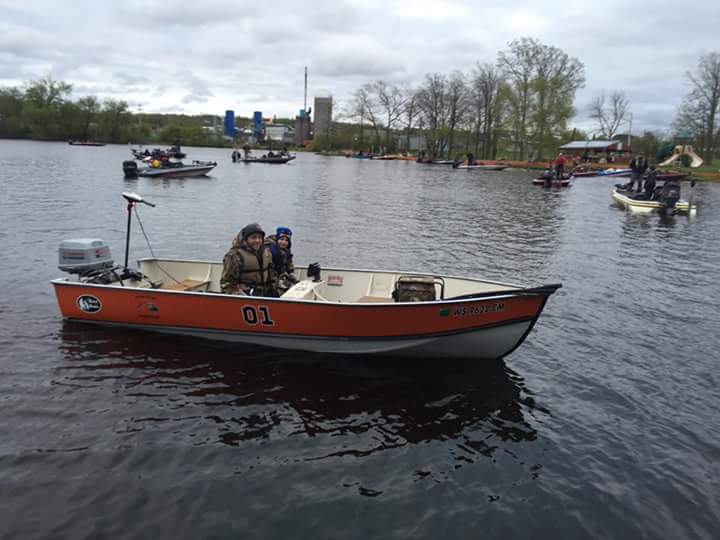
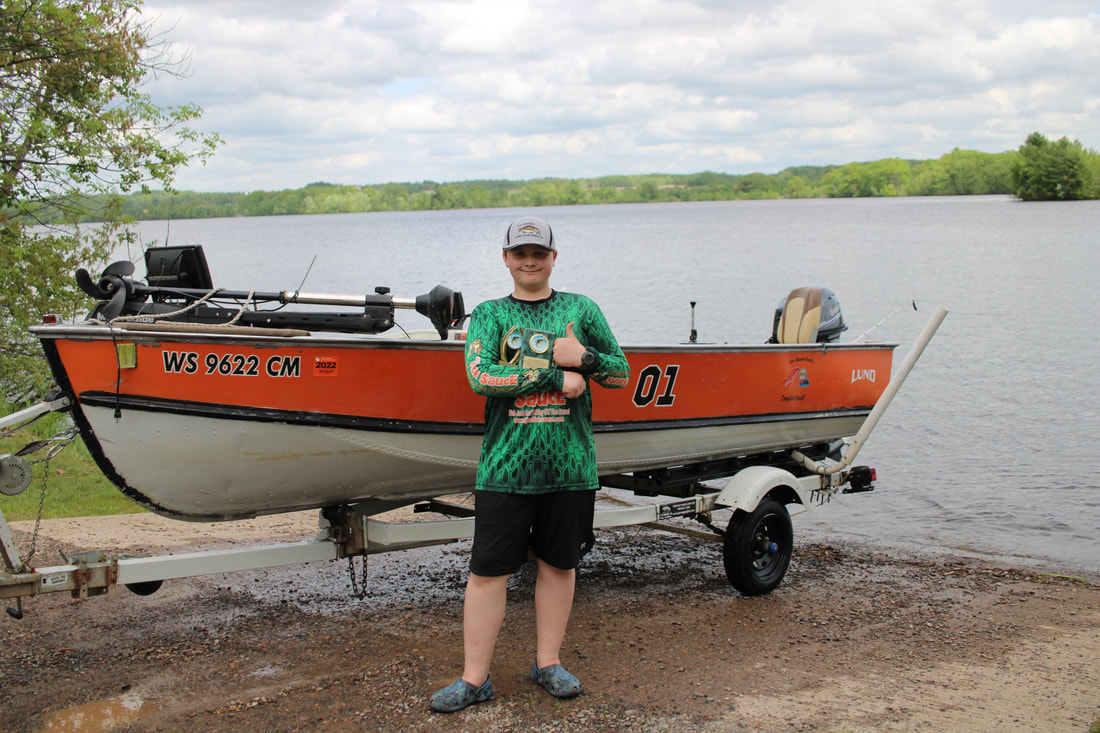
STEP 12 - ENTER THE CWBA LAKE CHETAC OPEN ON A SNOWY MAY DAY. At this point your 40 year old outboard is running fantastic from 2 years of Seafoam carb cleaning. Get a butt whuppin' by the guys that understand cold water tactics much better than you. Watch your 7 year old boy skip docks with a jerk shad and net his first tournament bass ever for him. Take the defeat but still have great pride as your little boy has competed against grown adults and probably landed more bass than a large number of them that miserable day. Laugh to yourself as you have more fun in your $2,000 General Lee boat than anyone could have in any other boat because all of the work, and nonsense involved in getting to this point was earned and couldn't be bought.